New Interface, Studio
With Moldex3D 2021 we have a new Interface called Studio;
Studio is a Ribbon style user interface with tabs and toolbars which increase user experience in the pre- and post-process of Moldex3D simulation.
The workflow in Studio is straight forward and can be summarized as follows;
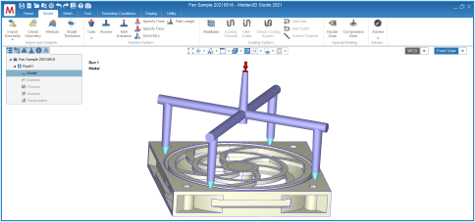
1; Import the geometry;
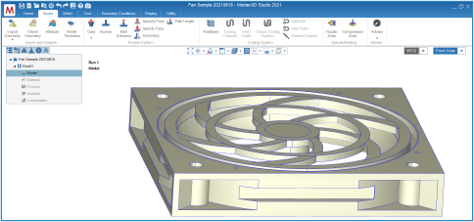
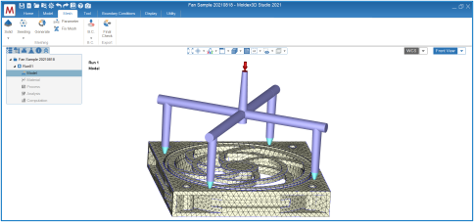
2; Add gate / gates. Can also be imported from CAD;

3; Create Runner. This can be an automatic process inside Studio as well as imported from CAD;
4; Define element length (node seeding);
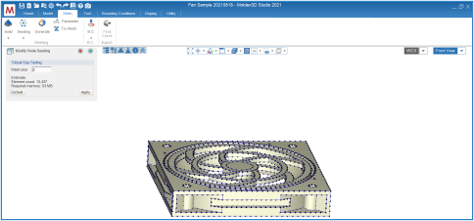
5; Generate Part surface mesh;
6; Different node seeding generate different number of surface elements;

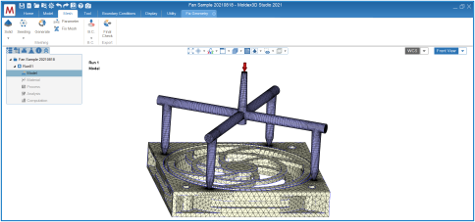
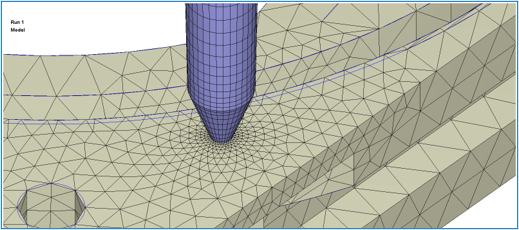
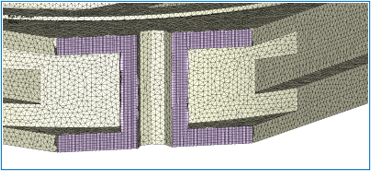
7; Create the 3D mesh. It possible to use different number of layers in the Boundary Layer mesh [BLM]. Here three, five respective seven layers are used. Up to 11 layers can be used. Five layers is recommended as a logic compromise in between accuracy and calculation speed.

8; Mesh also the Runner layout;
9; With a BLM mesh, the area around the gate will automatically be refined;
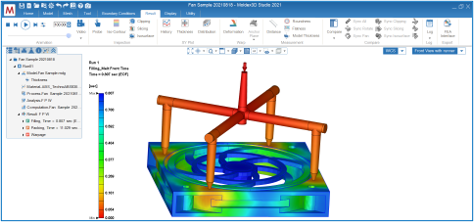
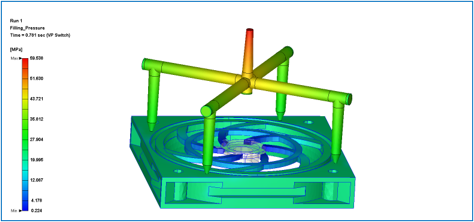
10; Select Material and Process and launch the simulation, and we receive results from the Filling phase, like this [Pressure (60 MPa) at the Velocity-Pressure-switch over];
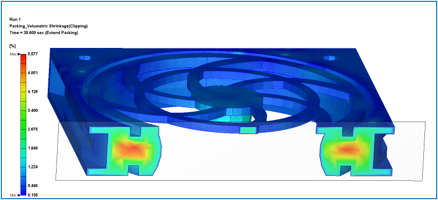
11; From the Packing phase, we, among other results, receive the Volumetric Shrinkage;
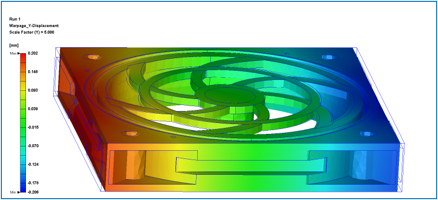
12; From the Warpage calculation, we receive the Displacement, here in Y-direction, exaggerated 5 times;
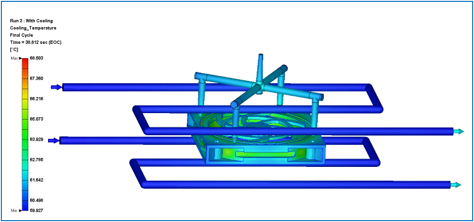
13; Assuming that we also launch a Cooling simulation, we receive the Temperature of the Mold;
14; We also offer eDesign, which is another software for Mold Filling Simulations, optimized for being really easy to use. eDesign use a completely different mesh and is therefore less sensitive for ”bad” CAD-models. The same kind of simulation can be used as with a BLM mesh and we also receive ”the same”, corresponding results;
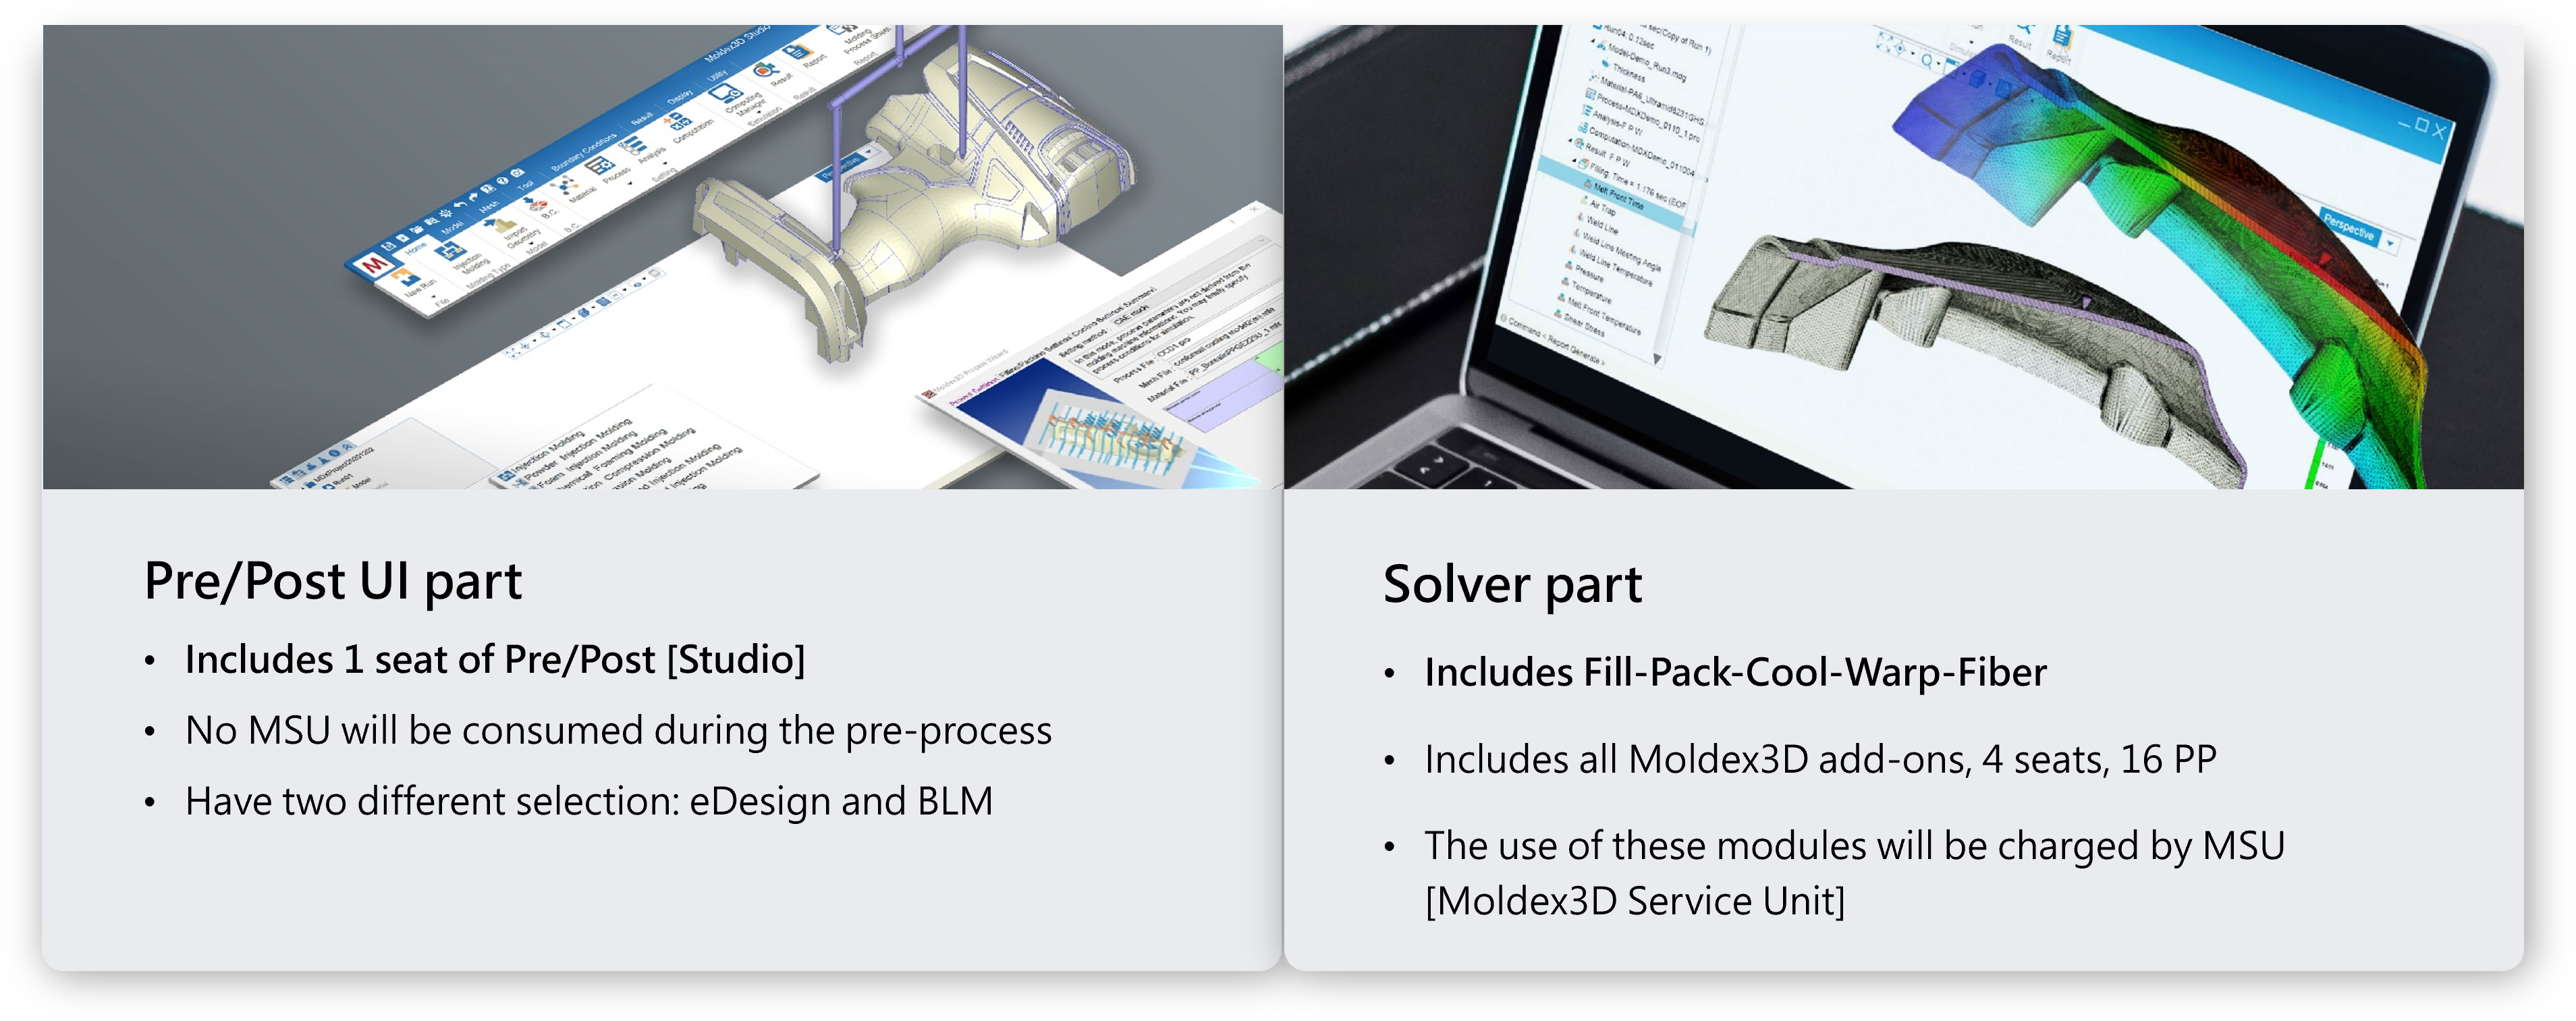
PPU;
Apart from purchasing (or renting) Moldex3D, when the User has unlimited access to the simulation tools [Fill-Pack-Cool-Warp], we also offer our PPU-licenses [Pay Per Use].
With a PPU-license, the User rent the Interface [Studio]. Studio is then free to be used 24/7 if so desired. And then the User pay (extra) per hour when using Moldex3D for calculations/simulations, e.g. when using Fill-Pack-Cool-Warp…